
I recently (well maybe not so recently, like 4 months ago) moved to a new house and my room still looks pretty plain because i never got round to decorating it.
So i decided to give my room some colour by adding this really simple DIY which easily changed the look of my room.
I've seen Polaroid cameras a lot recently and i really like how the pictures look so i thought, wouldn't it be a great idea to use this kind of pictures as room decor? and i did just that.

This DIY is incredibly easy and ends up looking really good but it also is really cheap which honestly is really important for me aha!
You will need:
1. A computer or iPad or somewhere where you have Internet access
2. A printer
3. A piece of string
4. A few clothes pegs
See, super simple already, let's get started!
First of all you will need to pick the pictures you want to use for this DIY, i chose pictures of me with my friends and One Direction pictures because i mean, i had to! Once you know which pictures you want to use you'll want to open your laptop and get on picmonkey.com, this is the website were you will make your pictures look like Polaroid ones!
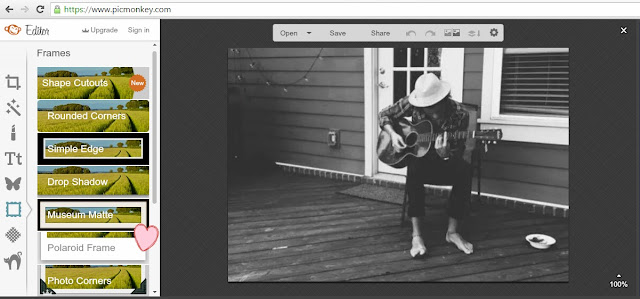
You need to click on the frames section and select the Polaroid frame (i marked where it is with a cute little heart to make it easier for you!)
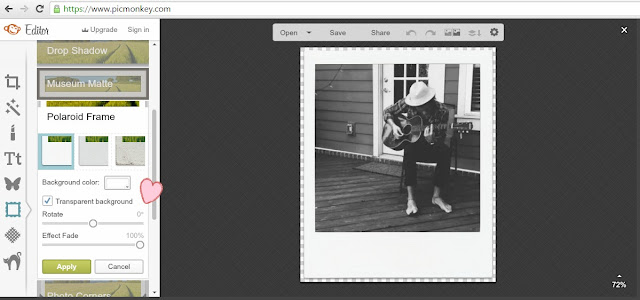
Once you've selected that, you'll need to turn rotation to 0 degrees so your picture is straight and not turned to the side. Next you have to to click the ''background'' colour button and select ''transparent background'' so the background behind your picture disappears and when you print it you'll only be able to see your Polaroid frame! The last thing you can do to your picture is add the Polaroid effect that picmonkey.com offers i personally like them better without the effect so i turned that to 100% to get rid of it!
Next thing you need to do is save all the pictures you made onto your computer, i like to save them all with the same name such as ''polaroid 1'' ''polaroid 2'' etc so it is easier for me to find them.
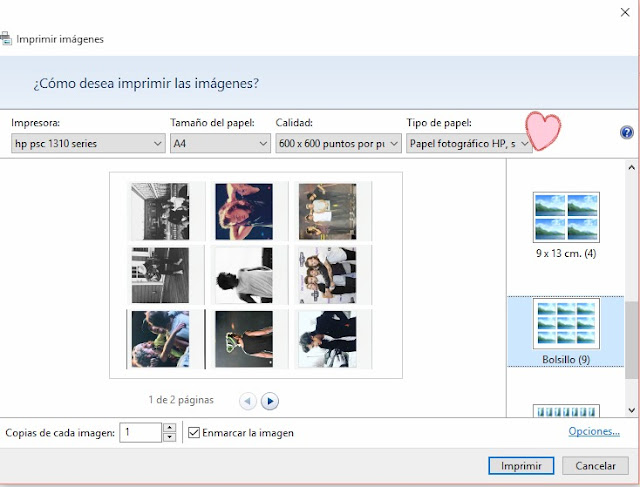
It's time to print them! Select all the pictures, right click on your mouse and select print, it is really important that you select the correct printing options, you can print your pictures on normal paper but i decided to use photography paper to give the pictures a nicer end and so they looked more like the actual Polaroids. Next thing you have to decide is what size you want your pictures to be and you can do this by either having 9 or 4 pictures printed on a sheet of paper. I printed 9 so they were smaller and so i would be able to fit more pictures on my headboard.
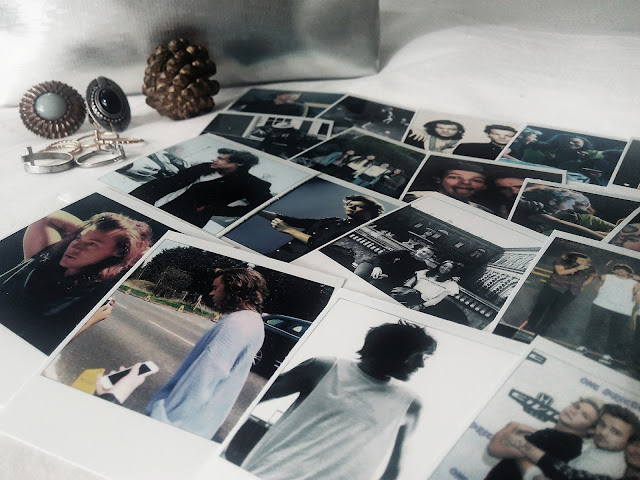
Once you've printed them all you need to do is cut them and place them where ever you want. As I said before, I decided to use them as room decor so I got my piece of string and used washi tape to tape the ends of it behind the headboard so nobody would be able to see, once that was secure I took the clothes pegs and placed the pictures on the piece of string.
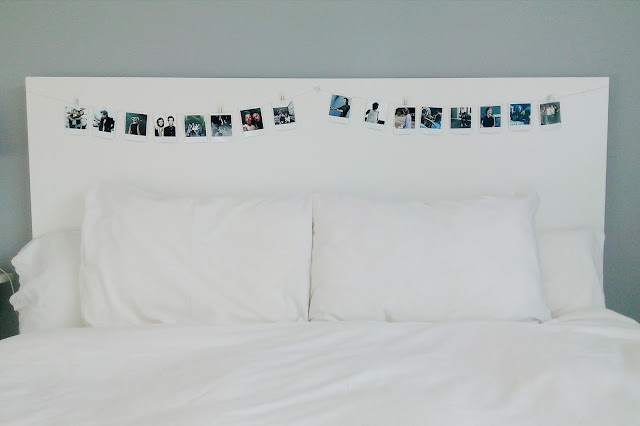
And that's really all you have to do to get this really cool Polaroid lookalike pictures! Easy right? Now it is your turn to try this!
So i decided to give my room some colour by adding this really simple DIY which easily changed the look of my room.
I've seen Polaroid cameras a lot recently and i really like how the pictures look so i thought, wouldn't it be a great idea to use this kind of pictures as room decor? and i did just that.
This DIY is incredibly easy and ends up looking really good but it also is really cheap which honestly is really important for me aha!
You will need:
1. A computer or iPad or somewhere where you have Internet access
2. A printer
3. A piece of string
4. A few clothes pegs
See, super simple already, let's get started!
First of all you will need to pick the pictures you want to use for this DIY, i chose pictures of me with my friends and One Direction pictures because i mean, i had to! Once you know which pictures you want to use you'll want to open your laptop and get on picmonkey.com, this is the website were you will make your pictures look like Polaroid ones!
You need to click on the frames section and select the Polaroid frame (i marked where it is with a cute little heart to make it easier for you!)
Once you've selected that, you'll need to turn rotation to 0 degrees so your picture is straight and not turned to the side. Next you have to to click the ''background'' colour button and select ''transparent background'' so the background behind your picture disappears and when you print it you'll only be able to see your Polaroid frame! The last thing you can do to your picture is add the Polaroid effect that picmonkey.com offers i personally like them better without the effect so i turned that to 100% to get rid of it!
Next thing you need to do is save all the pictures you made onto your computer, i like to save them all with the same name such as ''polaroid 1'' ''polaroid 2'' etc so it is easier for me to find them.
It's time to print them! Select all the pictures, right click on your mouse and select print, it is really important that you select the correct printing options, you can print your pictures on normal paper but i decided to use photography paper to give the pictures a nicer end and so they looked more like the actual Polaroids. Next thing you have to decide is what size you want your pictures to be and you can do this by either having 9 or 4 pictures printed on a sheet of paper. I printed 9 so they were smaller and so i would be able to fit more pictures on my headboard.

And that's really all you have to do to get this really cool Polaroid lookalike pictures! Easy right? Now it is your turn to try this!
Cool! Can you show us the final result in your room?
ReplyDeleteI just added the picture, hope you like it! :)
DeleteThis is such a simple, yet great idea.
ReplyDeleteThey look so real as well. Good job! And thanks for sharing.
http://jesandbleu.com
thank you and you are very welcome!
Deleteyour room looks wonderful!! love the tutorial.
ReplyDeletethank you so much :D
Delete